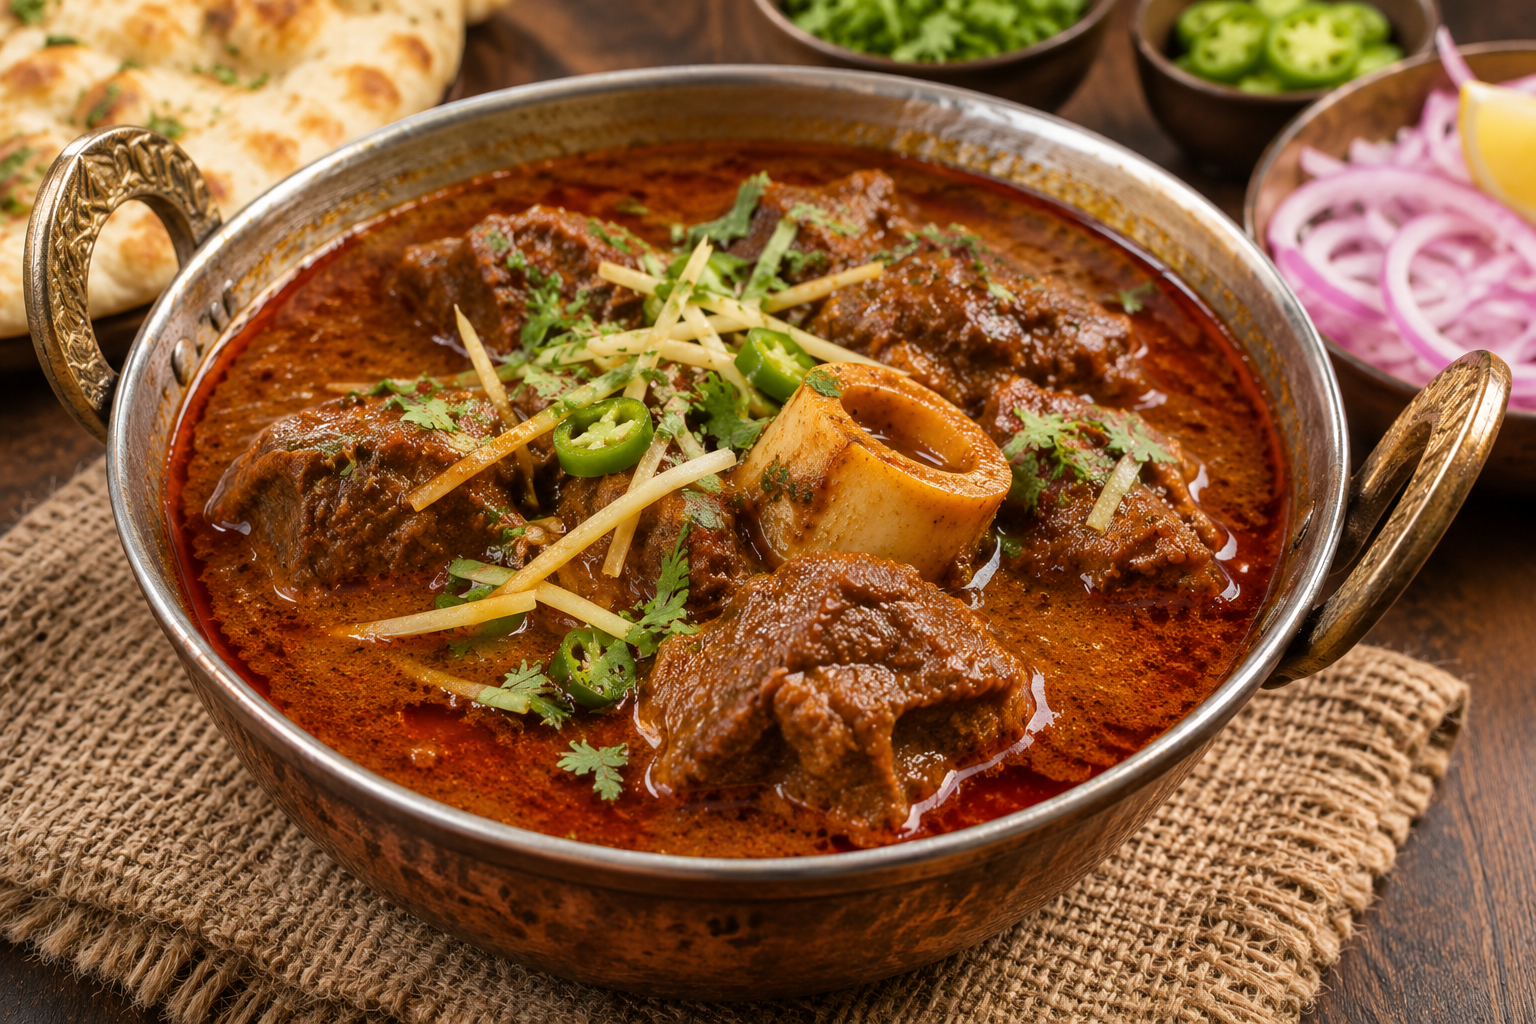
Traditional Pakistani Beef Nihari

A slow-simmered Pakistani beef nihari with tender shank, aromatic whole spices, a silky flour-thickened gravy, and classic ginger, cilantro, and green chili garnish.
Traditional Pakistani Beef Nihari
A slow-simmered Pakistani beef nihari with tender shank, aromatic whole spices, a silky flour-thickened gravy, and classic ginger, cilantro, and green chili garnish. This detailed guide walks through the ingredients, equipment, cooking sequence, texture cues, serving ideas, and storage so the recipe is practical to prepare in a home kitchen. The method below uses the quantities saved in the approved Better Home Recipes recipe record.
Prep time: 25 minutes | Cook time: 210 minutes | Total time: about 235 minutes | Servings: 6 | Difficulty: Hard
Introduction
A slow-simmered Pakistani beef nihari with tender shank, aromatic whole spices, a silky flour-thickened gravy, and classic ginger, cilantro, and green chili garnish. This detailed guide walks through the ingredients, equipment, cooking sequence, texture cues, serving ideas, and storage so the recipe is practical to prepare in a home kitchen. The method below uses the quantities saved in the approved Better Home Recipes recipe record.
The recipe is easiest to follow when you prepare the ingredients first and then work through the steps in order. Traditional Pakistani Beef Nihari takes approximately 25 minutes of preparation and 210 minutes of cooking, for 6 servings. These are practical estimates; actual timing can shift with burner strength, cookware size, ingredient temperature, and the size of the pieces. Use the visual cues in the instructions alongside the clock. Read through the full recipe before beginning, especially if it includes soaking, resting, chilling, or a long simmer. Those periods affect the overall schedule even when they require little active work. Set aside the serving garnishes and prepare any accompanying sauce before the main cooking stage begins.
Why You'll Enjoy This Recipe
This recipe is designed around a clear balance of flavor, texture, and manageable preparation. Its ingredients each have a purpose: the main ingredient provides the body of the dish, aromatics and spices build its flavor, and finishing ingredients bring freshness or contrast. The cooking method moves through those components in a deliberate order, helping the finished dish taste integrated rather than simply seasoned on the surface. It is also adaptable at the table: serve it with the suggested accompaniments and adjust optional heat or garnish to suit the people eating.
The sequence is important because each stage prepares the food for the next. Early preparation removes excess moisture, builds the base flavor, or brings ingredients to a useful temperature. The middle stages cook the main components and allow them to absorb seasoning. The final stage adjusts consistency and adds ingredients that are best kept fresh. Avoid skipping a rest, soak, reduction, or chilling period simply because the dish looks close to finished; those steps are often what create the intended texture.
Ingredients You'll Need
For the most reliable result, measure the ingredients before turning on the stove. The complete ingredient list is included below exactly as stored in the approved recipe, including quantities, optional items, and separate garnish or sauce components. Traditional Pakistani Beef Nihari depends on the balance between its primary ingredients and its seasonings. Keep fresh herbs, citrus, crunchy toppings, and other finishing elements separate until the point when the instructions call for them. Ingredients that are listed for a sauce, garnish, soaking liquid, or cooking fat are part of the complete recipe, not extras to overlook.
- 3 lb (1.35 kg) beef shank or bone-in beef shank pieces
- 3 tbsp ghee or neutral oil
- 2 medium yellow onions, thinly sliced (about 3 cups)
- 2 tbsp ginger-garlic paste
- 8 cups (1.9 L) hot water, plus more as needed
- 2 bay leaves
- 2 black cardamom pods
- 5 green cardamom pods
- 1 cinnamon stick (3 inches)
- 6 whole cloves
- 1 tsp black peppercorns
- 1 tsp cumin seeds
- 1 tbsp coriander seeds
- 2 tsp Kashmiri chili powder
- 1 tsp red chili powder, or to taste
- 1 tsp ground fennel
- 1 tsp ground ginger
- ½ tsp ground turmeric
- 1½ tsp kosher salt, plus to taste
- ¼ cup (30 g) all-purpose flour
- ½ cup (120 ml) cold water, for flour slurry
- 2 tbsp lemon juice, or to taste
- ¼ cup (10 g) chopped cilantro, for garnish
- 2 tbsp julienned fresh ginger, for garnish
- 2 green chilies, thinly sliced, for garnish
- 1 small lemon, cut into wedges, for serving
Check the list once before cooking and make sure you have every component, including the ingredients used for finishing, dipping, soaking, or serving. If an item is marked optional, you may omit it; otherwise, keep the quantity as written for the first attempt. Measuring carefully is especially helpful when a recipe depends on the right ratio of liquid to grains, a binder to hold a mixture together, or a thickener to give a sauce its final body.
Equipment
Prepare Heavy 6–8-quart Dutch oven or stockpot with lid; chef's knife and cutting board; small spice grinder or mortar and pestle; ladle and skimmer; whisk; immersion blender (optional); instant-read thermometer (optional) Choose cookware with enough room for the ingredients to cook without excessive crowding. A heavy-bottomed pan helps distribute heat more evenly and reduces the chance of scorching during longer cooking stages. A sharp knife and stable board make the preparation more consistent, while measuring spoons and a liquid measuring jug help keep the seasoning and moisture balance close to the tested quantities. Set out a clean plate or tray for ingredients that need to be removed temporarily during cooking.
Arrange the equipment so you can move safely between preparation and cooking. Keep handles turned inward, use dry cloths or oven mitts for hot cookware, and leave enough counter space for a tray or plate. If using a blender, allow hot ingredients to cool slightly and follow the appliance manufacturer's instructions rather than sealing hot liquid in a closed blender jar.
How to Make Traditional Pakistani Beef Nihari
The recipe is easiest to follow when you prepare the ingredients first and then work through the steps in order. Traditional Pakistani Beef Nihari takes approximately 25 minutes of preparation and 210 minutes of cooking, for 6 servings. These are practical estimates; actual timing can shift with burner strength, cookware size, ingredient temperature, and the size of the pieces. Use the visual cues in the instructions alongside the clock.
The sequence is important because each stage prepares the food for the next. Early preparation removes excess moisture, builds the base flavor, or brings ingredients to a useful temperature. The middle stages cook the main components and allow them to absorb seasoning. The final stage adjusts consistency and adds ingredients that are best kept fresh. Avoid skipping a rest, soak, reduction, or chilling period simply because the dish looks close to finished; those steps are often what create the intended texture.
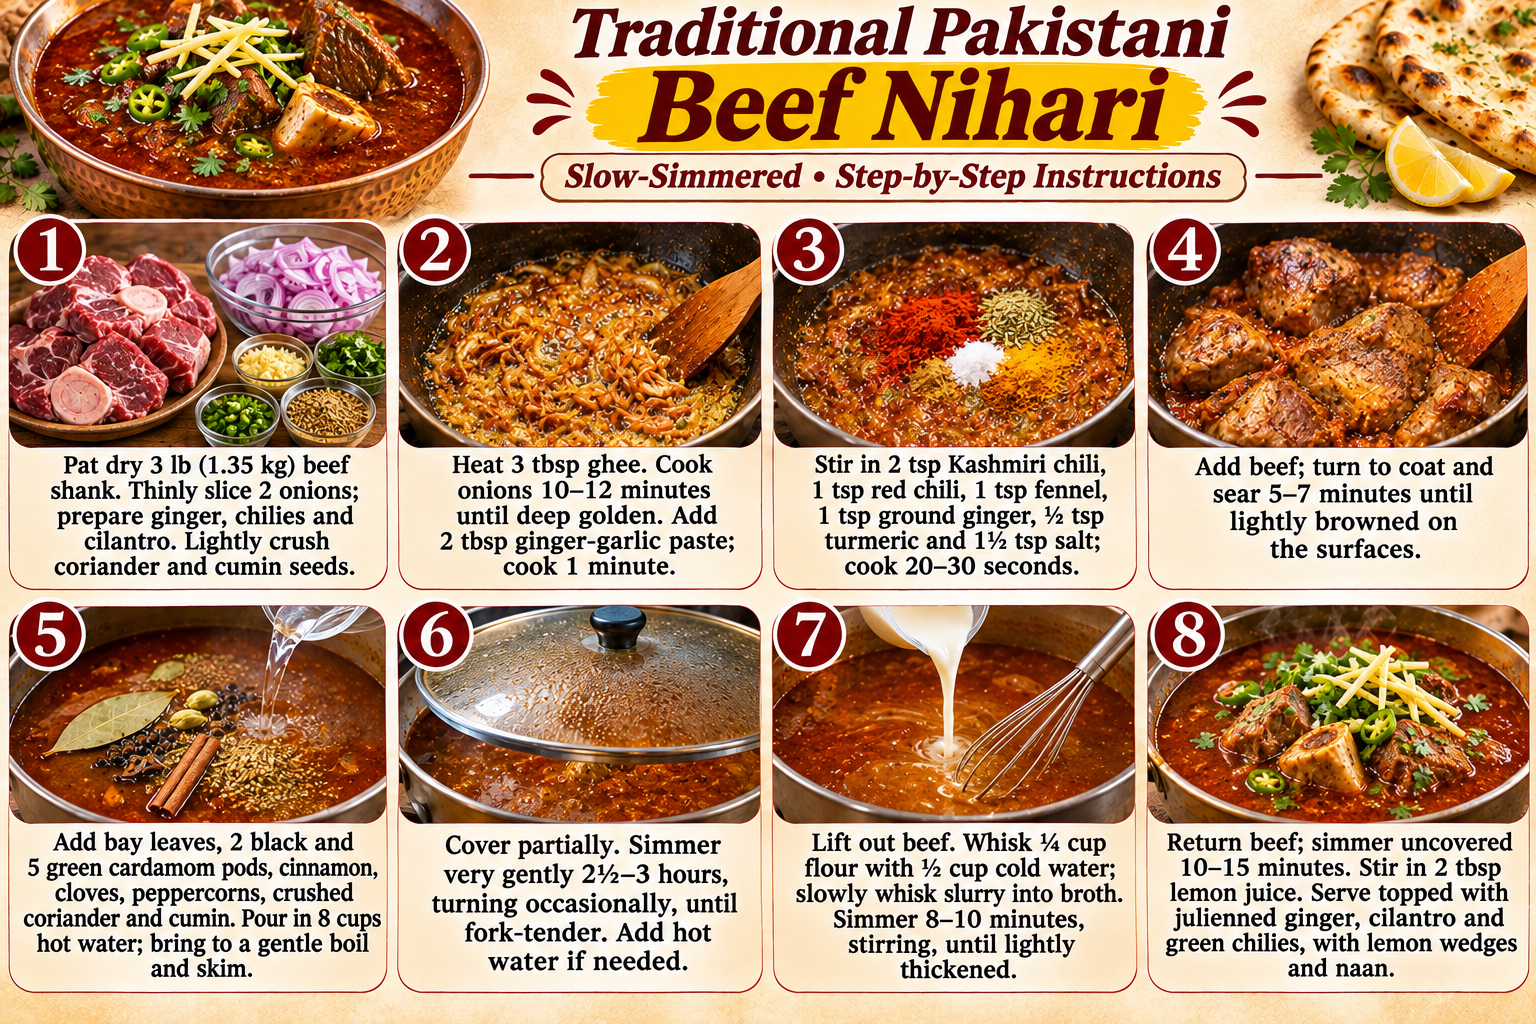
Pat the beef dry. If using a whole shank, ask the butcher to cut it into large serving pieces. Thinly slice the onions and prepare the garnish.
Complete this stage before moving on so the next ingredients can be added at the right moment. Keep the quantities measured and the work area organized; this makes it easier to notice changes in aroma, color, and texture.
Lightly crush the coriander and cumin seeds. Heat ghee in a heavy Dutch oven or stockpot over medium heat. Add onions and cook for 10–12 minutes, stirring often, until deep golden but not burnt.
Pay attention to the heat and the space in the pan. Ingredients should cook rather than steam in an overcrowded vessel. If the recipe calls for batches, take the extra moment to do them separately for a more even result.
Add ginger-garlic paste and cook for 1 minute. Stir in Kashmiri chili, red chili, fennel, ground ginger, turmeric, and salt for 20–30 seconds.
Aromatics and spices can become bitter if they scorch. Stir as directed and adjust the heat if the pan is cooking too aggressively. The goal is to release their aroma and coat the other ingredients evenly.
Add the beef and turn to coat in the spiced onion mixture. Sear for 5–7 minutes, turning the pieces so their surfaces are lightly browned.
Look for the texture described in the step rather than relying on color alone. Ingredients often continue cooking after liquid is added, so allow enough time for them to soften or absorb flavor before continuing.
Add bay leaves, black and green cardamom, cinnamon, cloves, peppercorns, crushed coriander, and cumin. Pour in 8 cups hot water and bring to a gentle boil, skimming any foam from the surface.
When the main ingredients return to the pan or pot, distribute the seasoning evenly. Scrape the bottom gently to release flavorful browned bits, but do not scrape burnt material into the food.
Cover partially and simmer very gently for 2½–3 hours, turning the beef occasionally, until the meat is fork-tender and the connective tissue is soft. Add hot water if needed to keep the meat mostly submerged. Keep the simmer gentle rather than boiling hard.
This stage controls the final consistency. Keep the heat steady and stir at the frequency suggested, especially as the mixture thickens or the liquid level falls. Add extra liquid only when the instructions allow it.
Lift the beef out carefully and set aside. Remove and discard the whole spices if easy to identify. For a smoother gravy, blend the onion-rich broth carefully with an immersion blender, or leave it rustic.
Check doneness at the thickest or least exposed part of the food when relevant. If a safe internal temperature is specified, use a thermometer; appearance alone is not a reliable substitute for temperature.
Whisk the flour with ½ cup cold water until completely smooth. Bring the broth to a gentle simmer and slowly whisk in the slurry. Simmer 8–10 minutes, stirring often, until the gravy thickens lightly and the raw flour taste disappears.
Finish with the listed garnish or resting time. Resting allows heat and moisture to settle, while fresh herbs, citrus, and crisp toppings are best added near serving so they retain their character.
Return the beef to the pot and simmer uncovered for 10–15 minutes so the meat warms through and the gravy coats it. Add lemon juice and taste for salt and heat. Add a little hot water if the gravy is thicker than you prefer.
Complete this stage before moving on so the next ingredients can be added at the right moment. Keep the quantities measured and the work area organized; this makes it easier to notice changes in aroma, color, and texture.
Serve in warmed bowls. Top generously with julienned ginger, cilantro, and green chilies. Offer lemon wedges and naan alongside.
Pay attention to the heat and the space in the pan. Ingredients should cook rather than steam in an overcrowded vessel. If the recipe calls for batches, take the extra moment to do them separately for a more even result.
Use the stated cooking times as a guide, not as the only test of doneness. Larger pieces may need more time, while smaller pieces or a wider pan may cook faster. If the recipe includes meat or poultry, follow the safe temperature guidance in its instructions. If it includes rice, lentils, or other grains, check that the center is tender and the liquid has been absorbed as described before serving.
Tips and Troubleshooting
Beef shank is ideal because collagen softens during the long simmer and enriches the broth. Keep the pot at a bare simmer; a rolling boil can toughen meat and make the gravy cloudy. The flour slurry should be whisked smooth with cold water before it enters the hot broth. Nihari thickens as it rests, so keep the gravy slightly looser than the final texture you want. If the result seems too wet, first identify whether the recipe calls for reducing liquid, draining, squeezing, or resting; do not add dry ingredients at random. If it seems too thick, loosen it gradually with the liquid specified in the recipe or notes. If browning is happening too quickly, lower the heat before the exterior burns. Season in small increments and taste again after the food has reached its final consistency, because concentration can make salt and spices more pronounced.
Try to correct texture problems gradually. A small amount of liquid can loosen a thick mixture, while a little more uncovered cooking can reduce excess moisture when the recipe calls for it. Avoid increasing the heat sharply to hurry a slow stage; the outside may overcook before the inside is ready. If you are preparing the recipe for the first time, note how your particular stove and cookware behave so you can make small timing adjustments on the next attempt.
Easy Variations
Lamb shank may be used, but begin checking tenderness after about 1½–2 hours. Use ghee for traditional richness or neutral oil. For gluten-free thickening, use 2 tablespoons cornstarch mixed with ¼ cup cold water instead of flour, adding gradually; texture will differ. When making a substitution, consider what the original ingredient contributes. A replacement may change moisture, fat, acidity, structure, or cooking time, so make one change at a time. Keep the main quantities and method unchanged on the first attempt; once you know the intended texture, it is easier to judge how a variation affects the result. Optional garnishes are the simplest way to personalize the dish without changing the cooking process.
What to Serve With It
Serve Traditional Pakistani Beef Nihari while it is at its best temperature and texture. Choose accompaniments that create contrast rather than competing with the main dish. Fresh vegetables, a simple salad, yogurt-based sides, citrus, chutney, flatbread, or rice can balance a richly seasoned main, while a light garnish can bring freshness to a softer or creamier preparation. If the dish includes a sauce or gravy, provide bread or rice that can carry it. Keep cold accompaniments chilled until serving and add delicate garnishes at the last moment.
Make-Ahead, Storage, and Reheating
Some preparation can be completed ahead, such as measuring spices, chopping sturdy vegetables, preparing a chutney, or soaking grains and pulses when the recipe specifies it. Keep raw ingredients covered and refrigerated where appropriate, and do not leave perishable foods at room temperature for extended periods. Cool promptly and refrigerate in shallow airtight containers for up to 3 days. The gravy may set when cold; this is normal. Freeze for up to 2 months. Reheat gently on the stovetop over low heat, stirring and adding hot water as needed, until the center reaches 165°F (74°C). Garnish after reheating. For best quality, store crunchy toppings, fresh herbs, bread, and sauces separately when combining them would soften or dull their texture. Reheat only the portion needed, using gentle heat and adding a little of the recipe's suggested liquid if the food has thickened during storage.
Frequently Asked Questions
What cut of beef is best for nihari?
Beef shank is a classic choice because its connective tissue becomes tender and enriches the gravy during slow cooking.
Can I make nihari in a pressure cooker?
Yes. Use the same browning and spice steps, then pressure-cook according to your cooker and the size of the beef pieces until fork-tender. Release pressure safely, thicken the broth with the slurry, and simmer to finish.
Closing Thoughts
This traditional pakistani beef nihari recipe is intended to be repeatable, not complicated. Keep the ingredient quantities together, follow the cooking order, and use the texture cues to decide when each stage is ready. The first time you make it, stay close to the method; after that, you can adjust heat, garnish, or serving accompaniments to match your preferences while keeping the core technique intact.
Ready to make something?
Turn inspiration into dinner.
Browse our tested recipes for practical step-by-step ideas, weeknight favorites and something delicious to try next.
Find your next recipe →Helpful Tools for This Recipe
Disclosure: Affiliate disclosure: This post contains affiliate links. As an Amazon Associate I earn from qualifying purchases at no extra cost to you.
 (paid link)
Pre-Seasoned Cast Iron Skillet (10.25-inch)
Provides exceptional heat retention and unbeatable browning for chicken, steaks, and skillet pastas.
 (paid link)
Heat-Resistant Seamless Silicone Spatula Set
Withstands up to 450°F and scrapes nonstick pans cleanly without scratching protective coatings.
 (paid link)
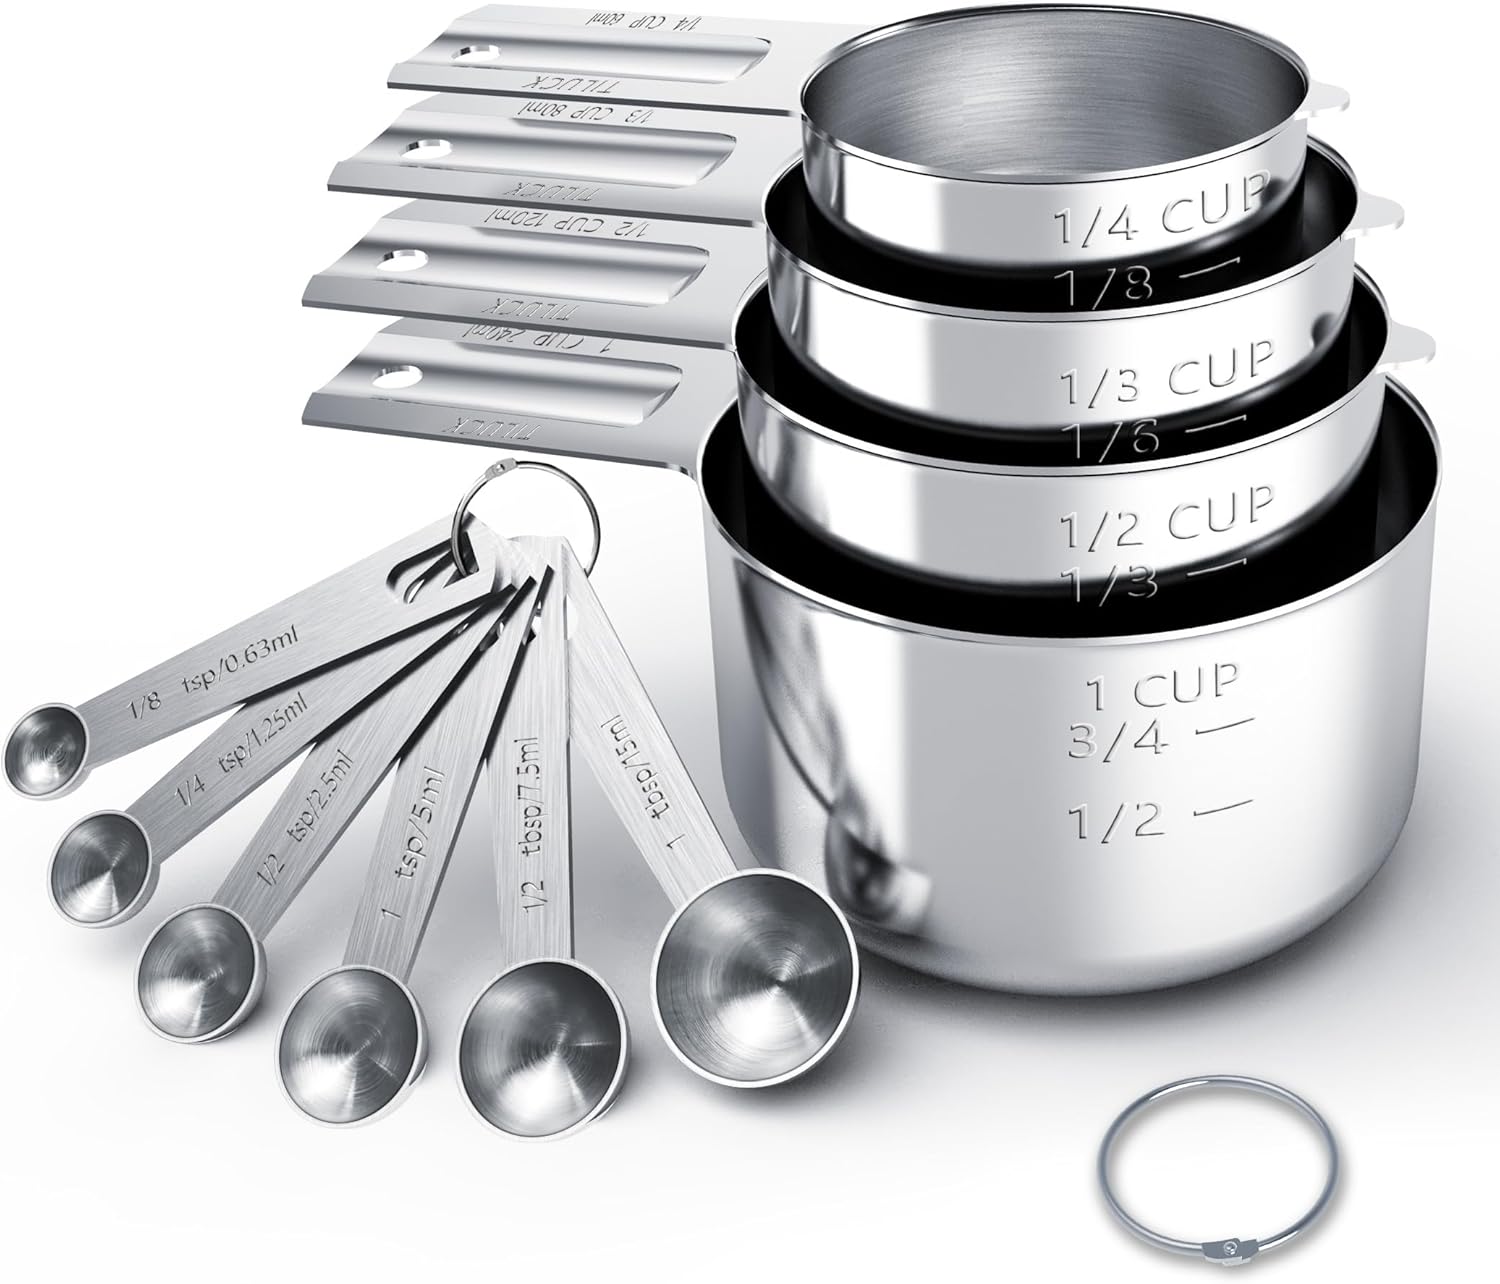
Heavy-Gauge Stainless Steel Measuring Cups & Spoons
Etched measurement markings never fade through dishwashing, ensuring precise seasoning balance.